

How to bypass any captcha with AntiGate tasks
A new video version of the AntiGate tasks tutorial is available here.
After years of research and development, we introduce a universal solution to help your robots pass through captcha gates built by humans. We call it "AntiGate", and these are the scenario templates our human workforce uses to execute exact tasks.
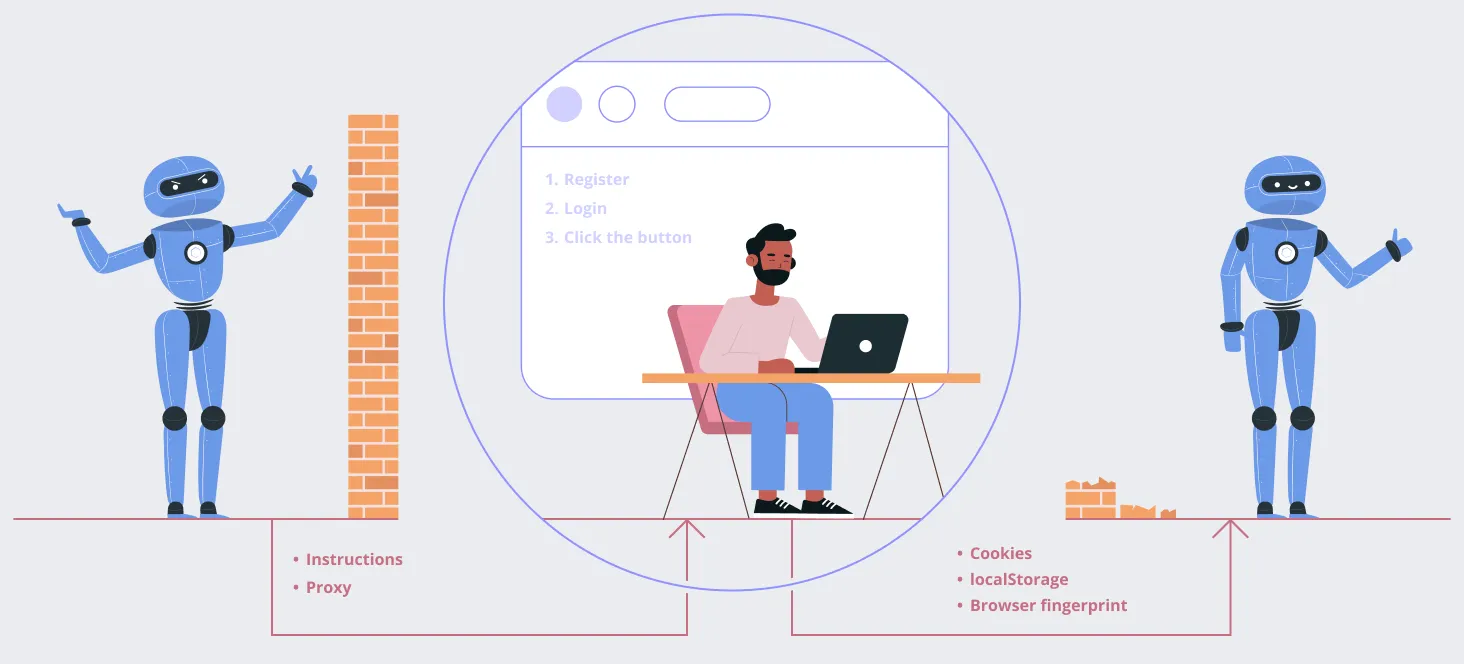
- First, choose a template. You can use an existing one or create your own. A template is a set of step-by-step instructions that workers execute.
- Second, provide any additional data the template requires, like the value of an input to fill, the CSS selector of an input, or the web address we should navigate to. We'll talk some more about templates in a moment.
- Third, and optional - proxies. You need them if a website associates each session cookie with an exact IP address.
What are the AntiGate templates?
An AntiGate template defines an exact scenario that our workers should go through. Templates consist of steps, which are all executed sequentially. When one step is completed, the worker moves on to the next. When all the steps are completed, the task is finished, and a snapshot of the worker session is taken and sent back to your app.
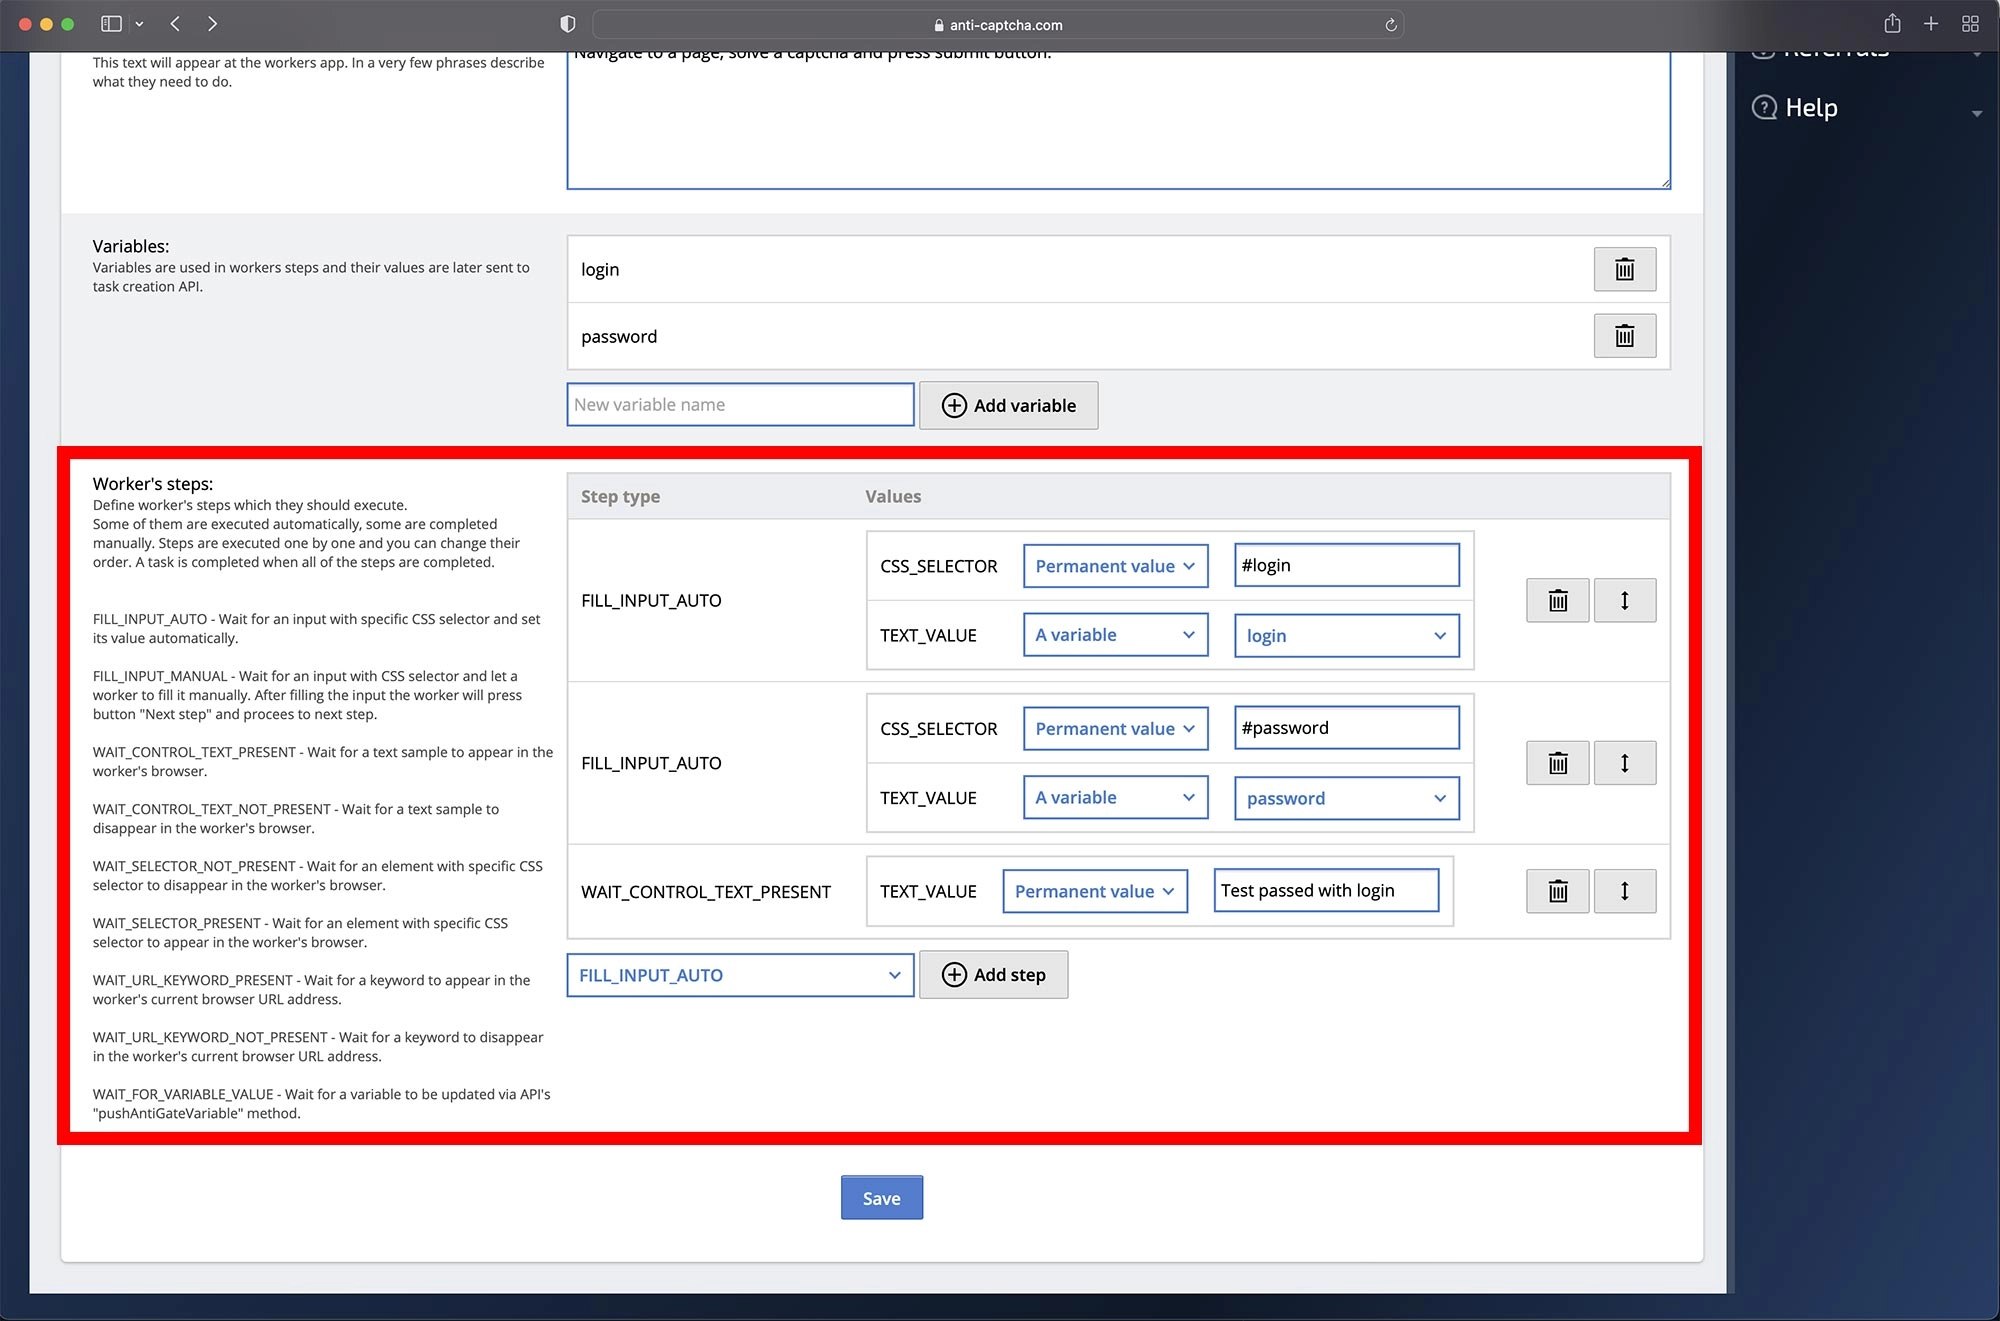
- Fill a text input field automatically or manually.
- Wait for a text sample to appear (or disappear) on the page.
- Wait for a DOM element defined by CSS to appear on (or disappear from) the page.
- Wait for a keyword to appear in (or disappear from) the worker's current browser URL address.
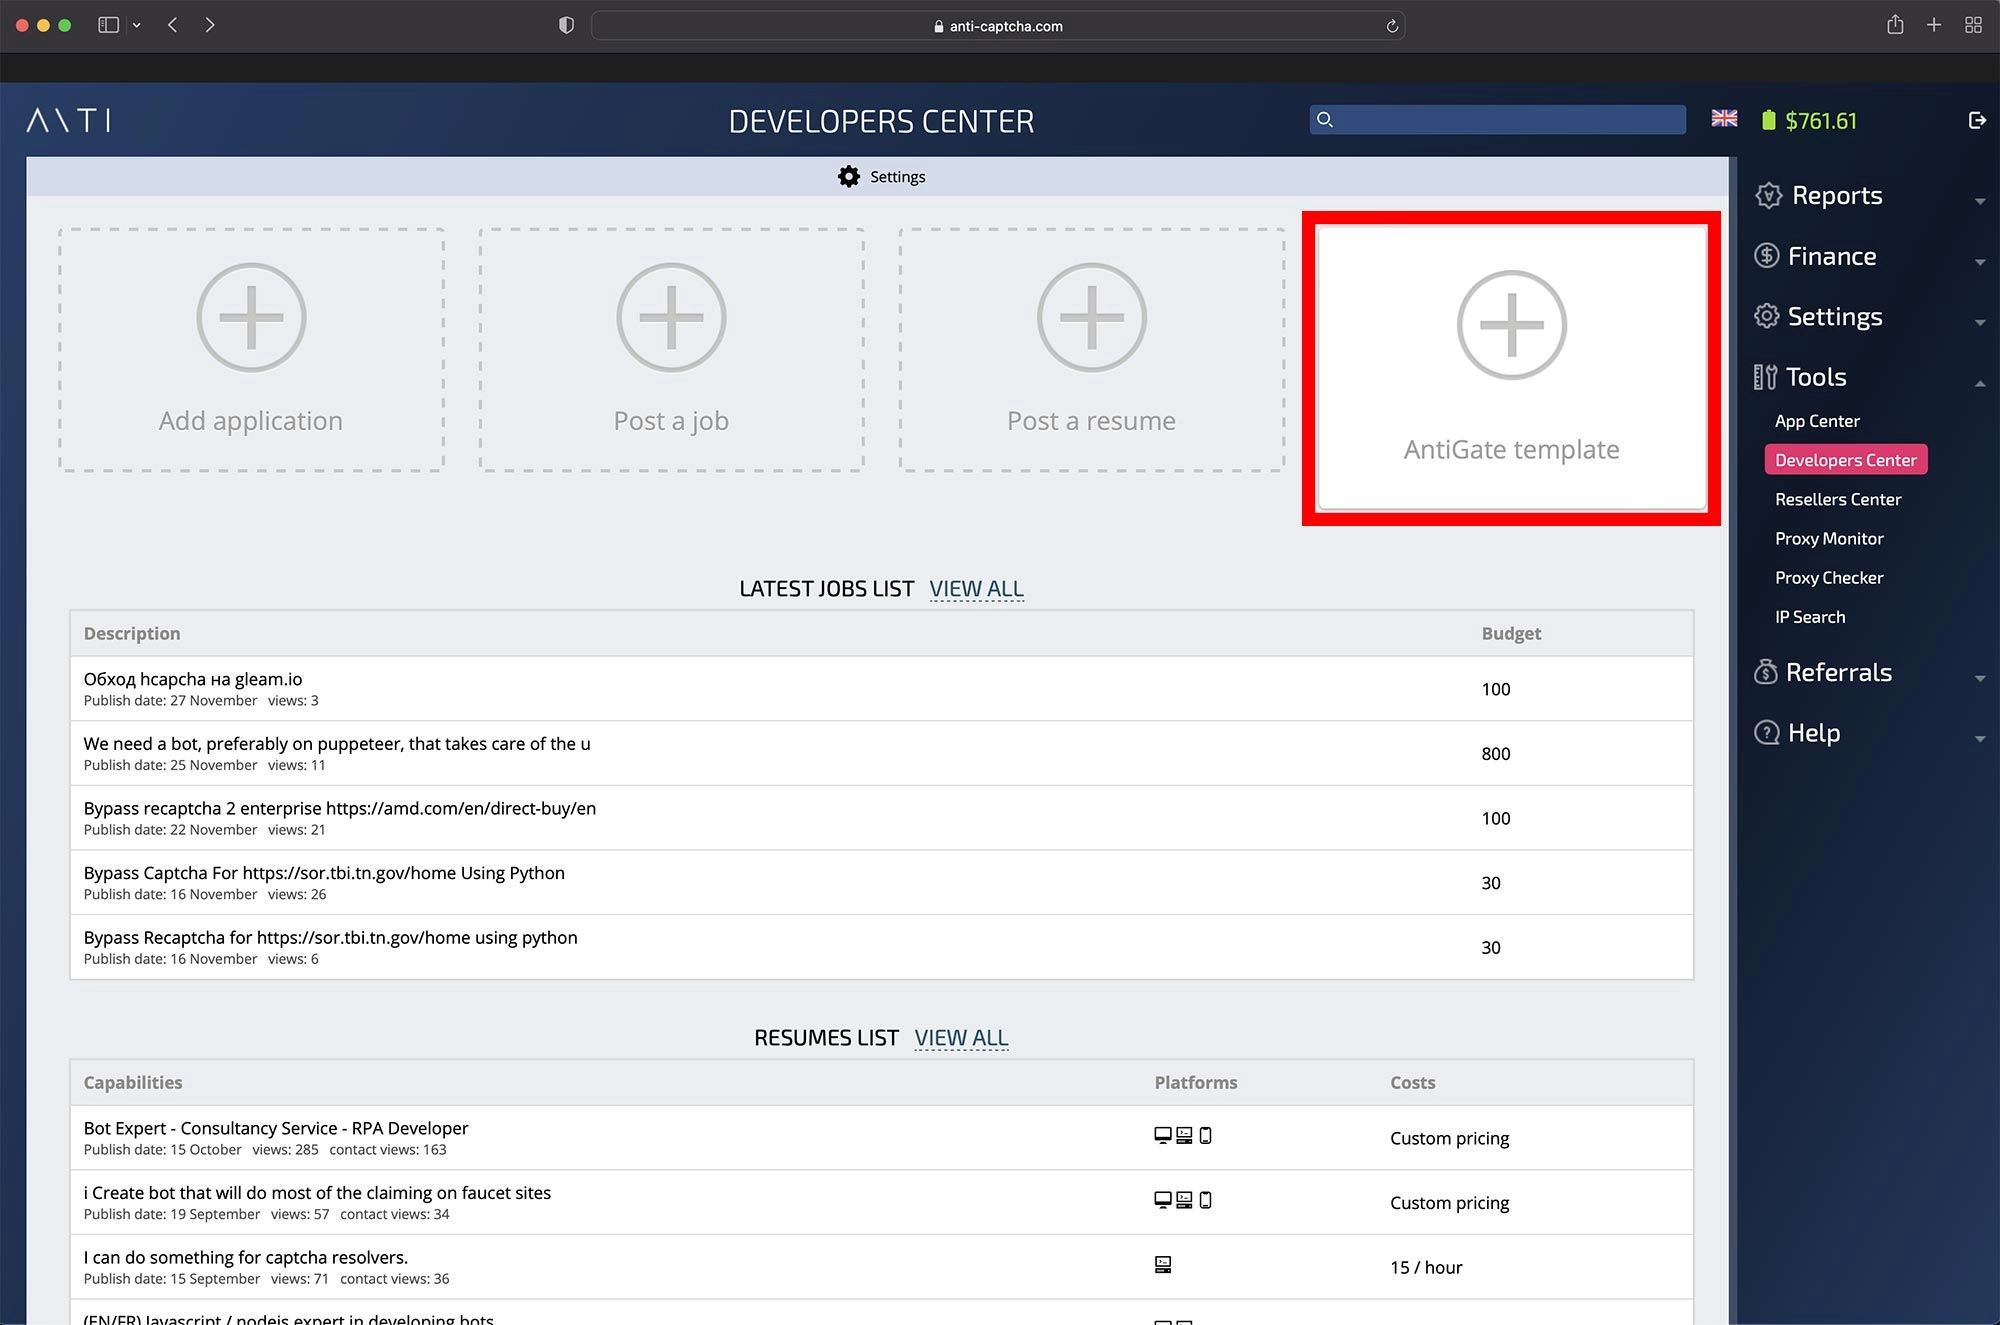
- Template name. Once saved, this can't be modified. Once you publish it, your template becomes available in the API by this name.
- Description for customers. Public templates are available in our templates directory.
- Description for workers. This is the text our workers see at the top of the page.
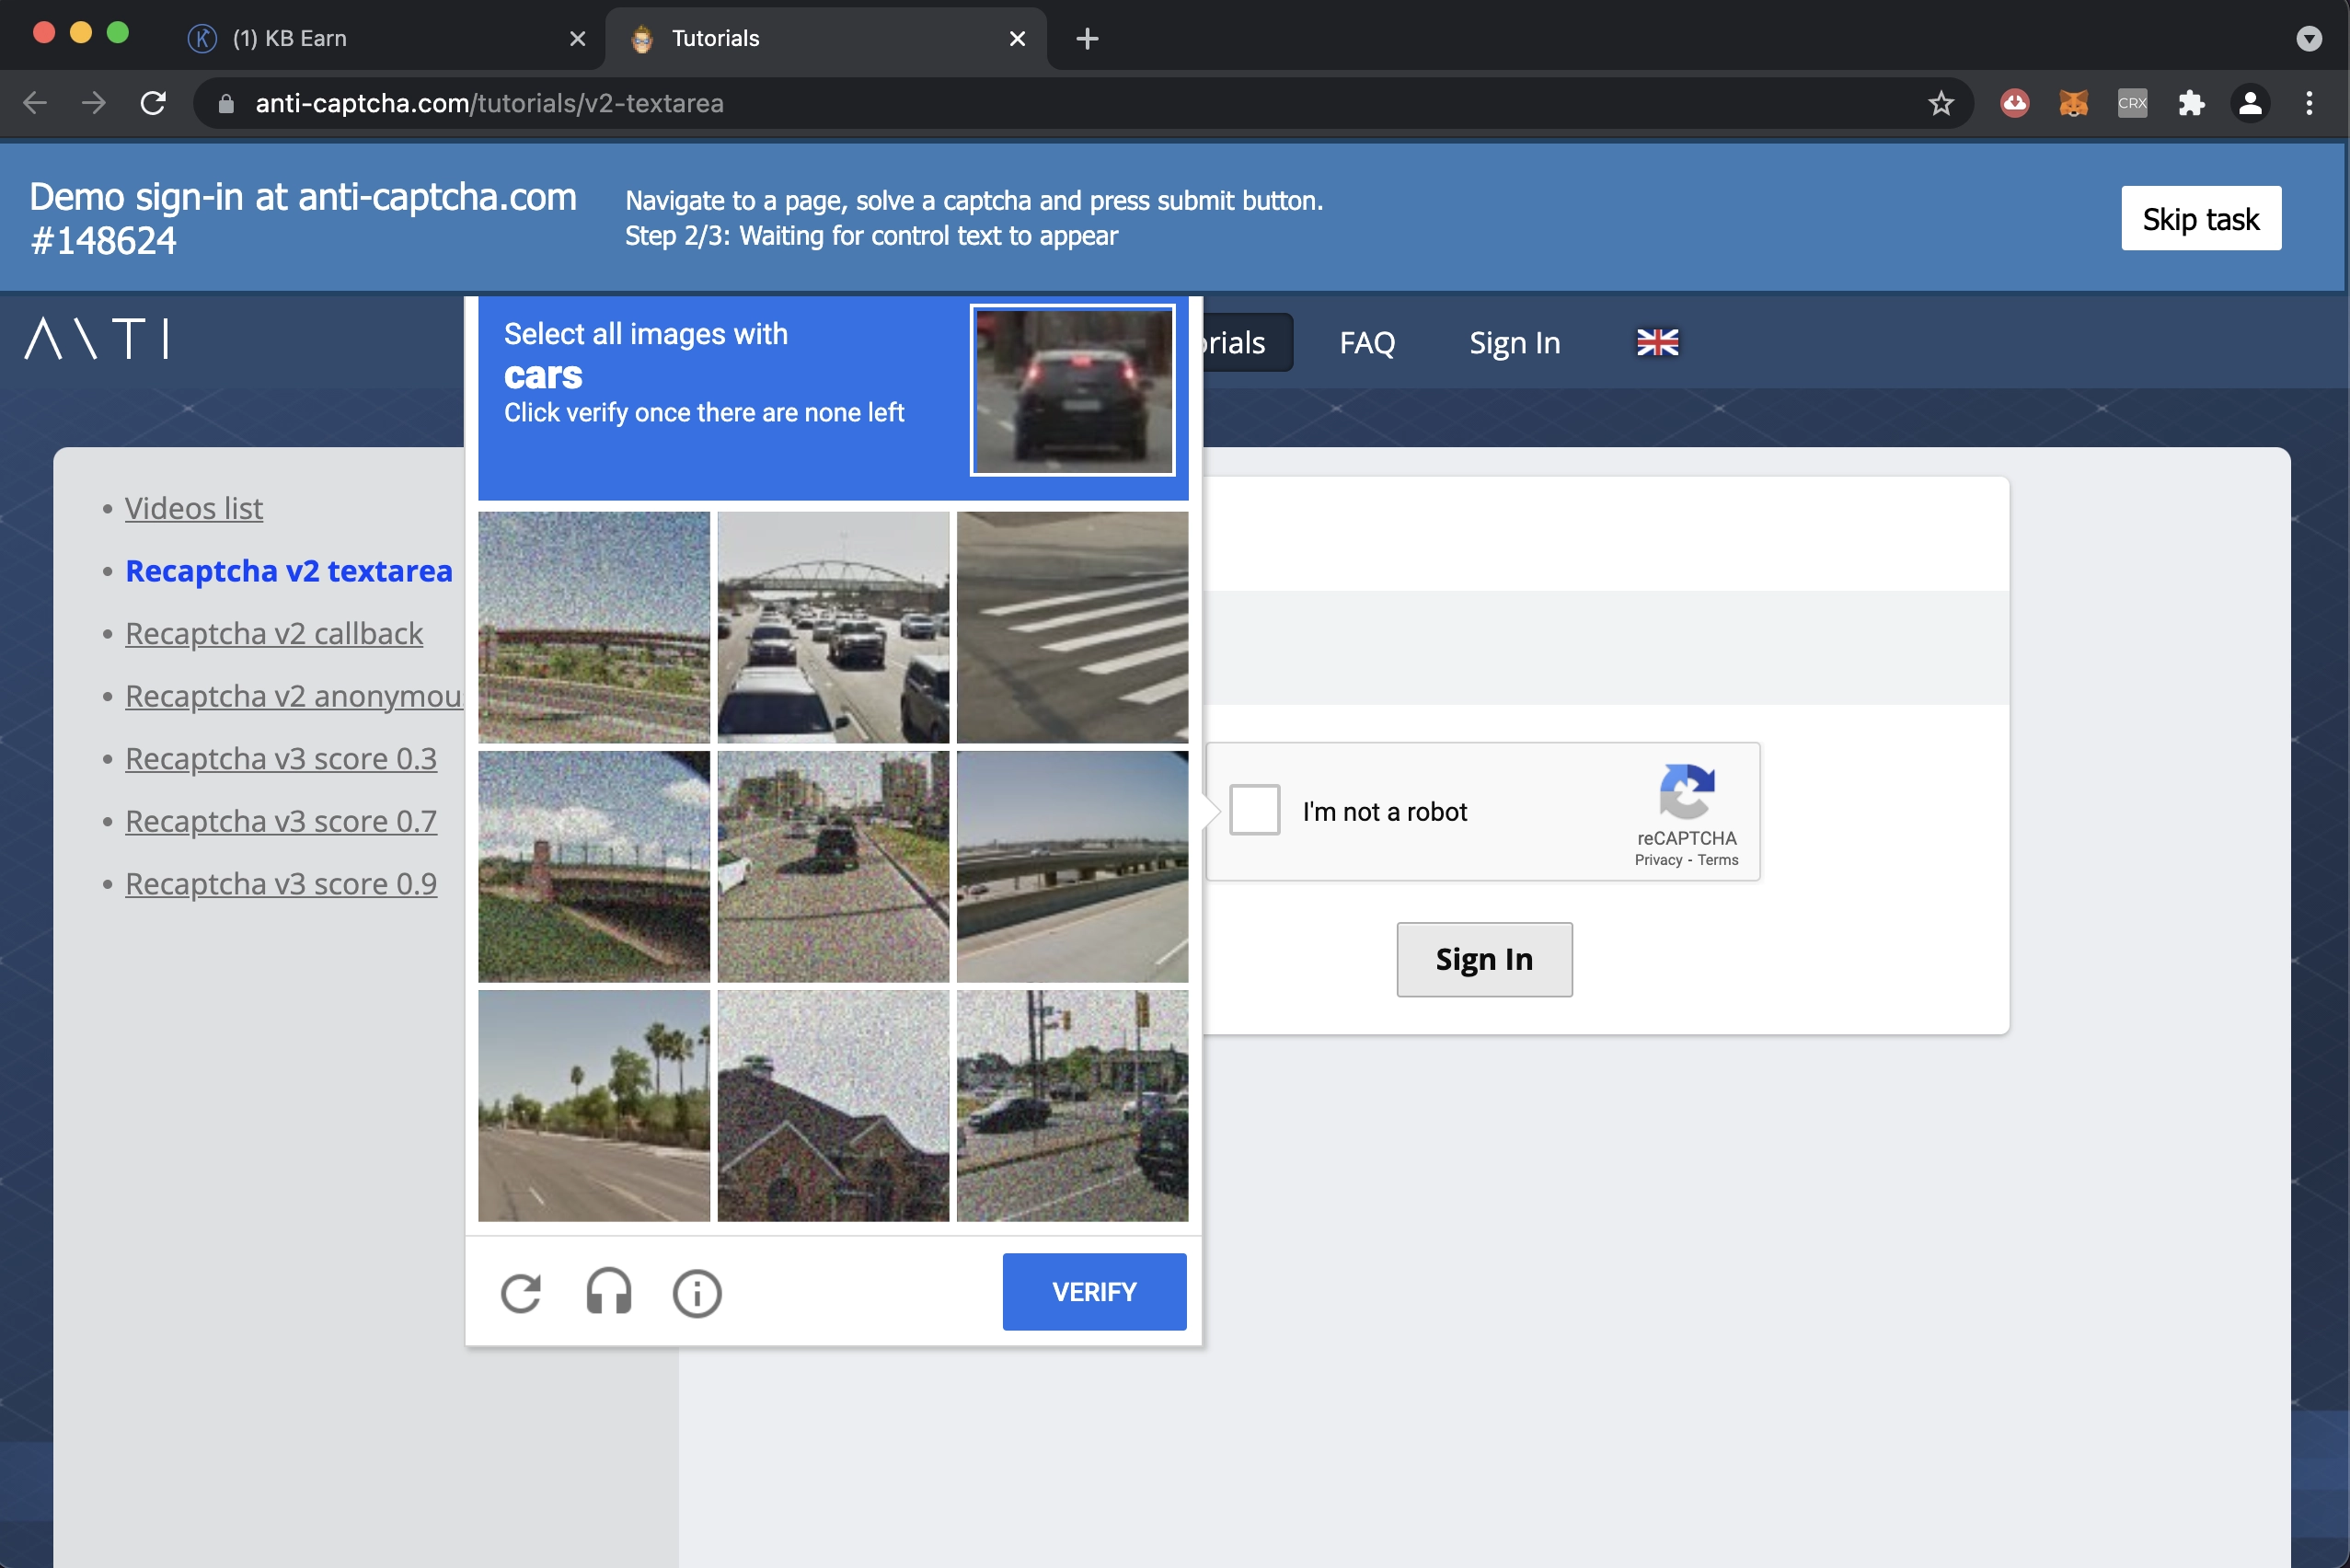 Workers interface example
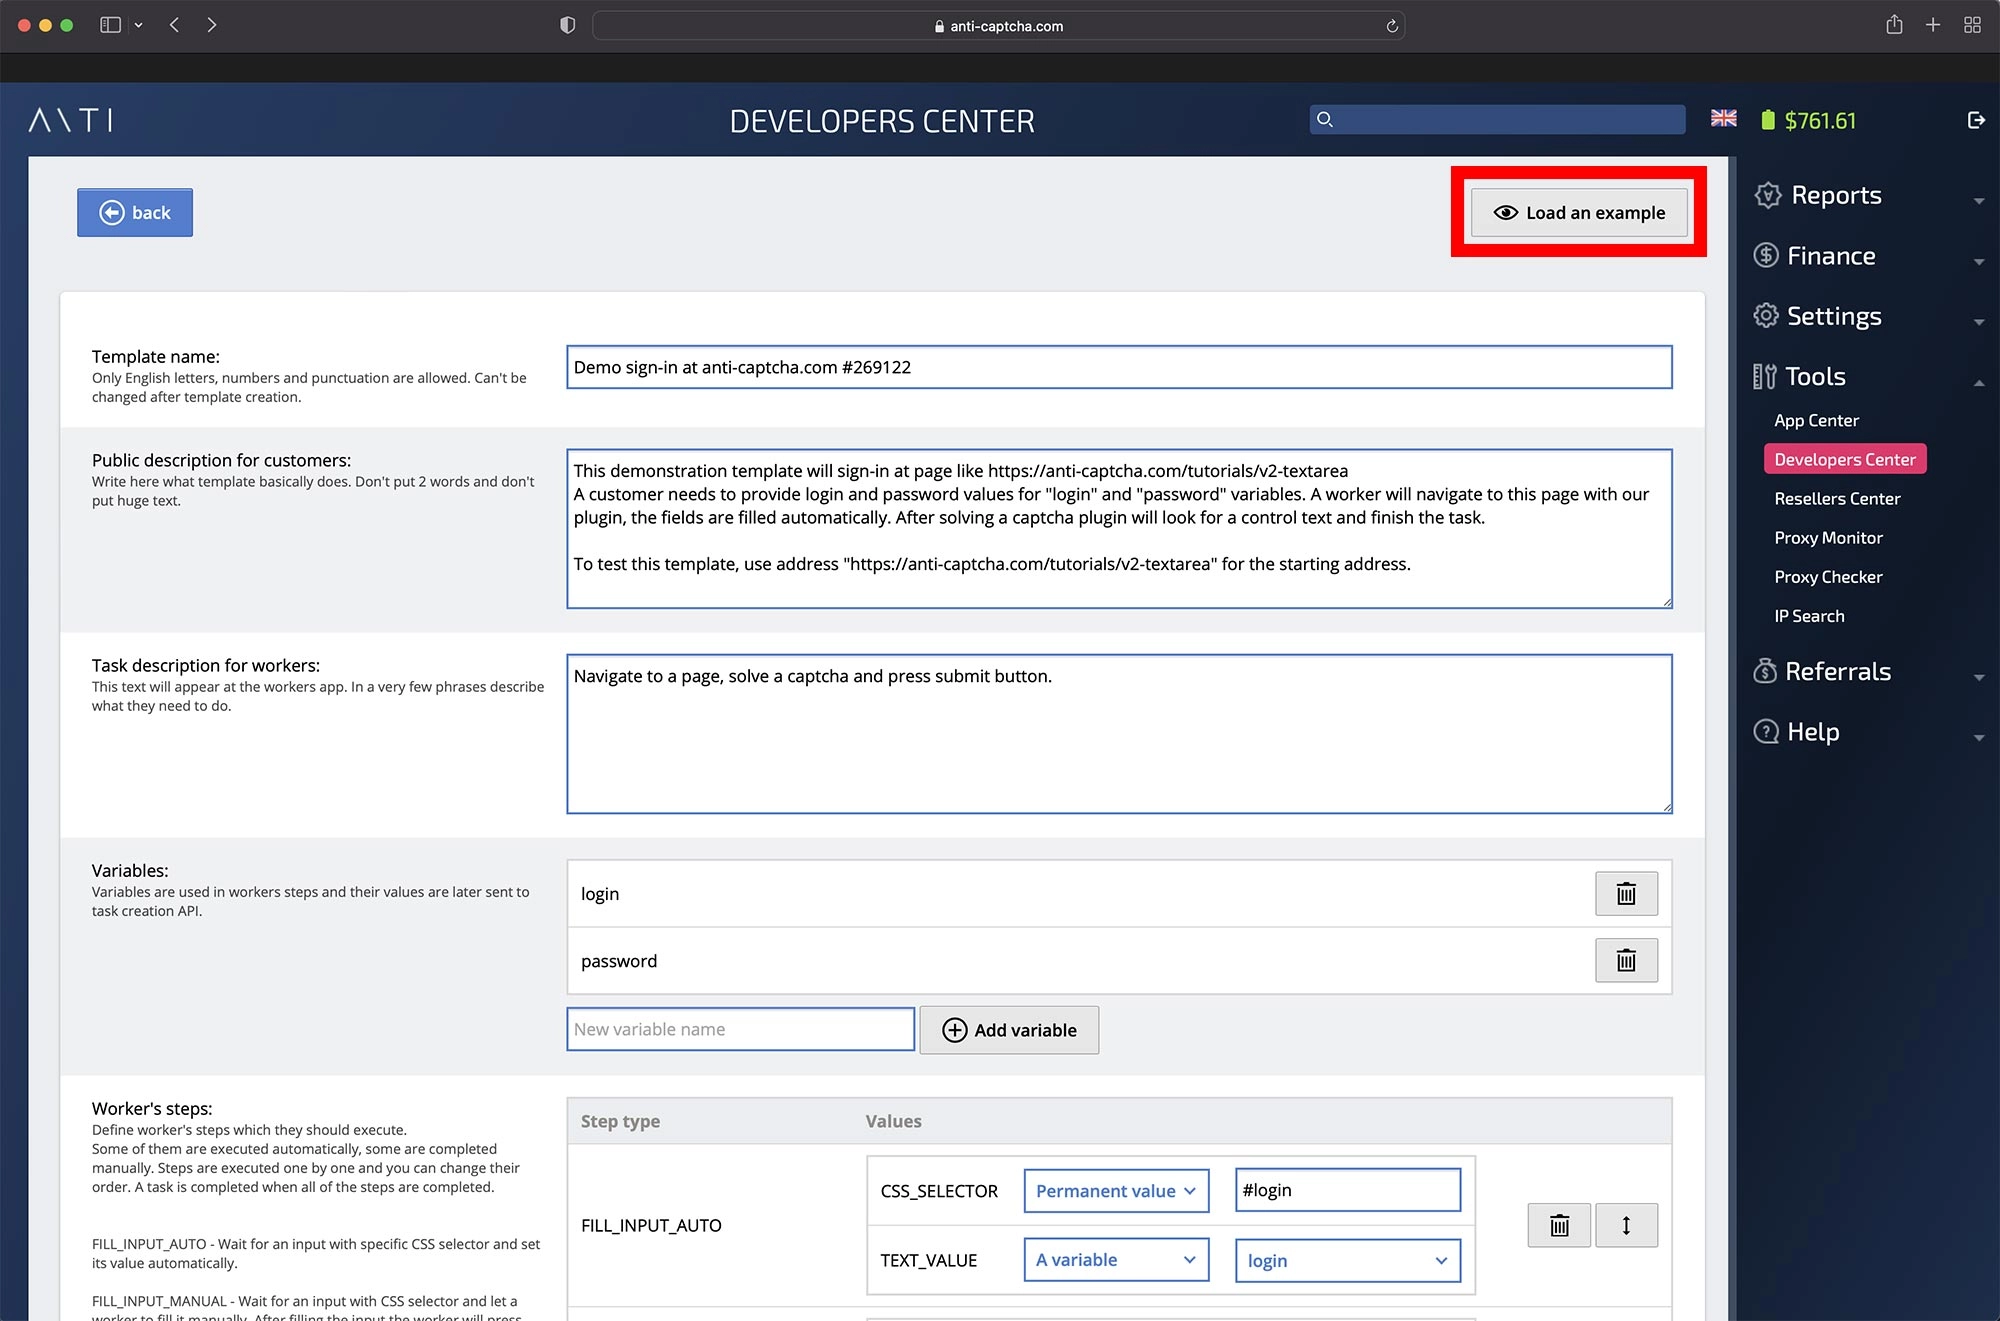
 - Variables. This is a list of variable names you can add to use in the steps instead of permanent values. In this example, we have 2 variables, "login" and "password". These 2 are used in steps 1 and 2 to fill the demonstration sign-in form. This way, you can provide these values via the API instead of hardcoding a permanent login and password in the template.
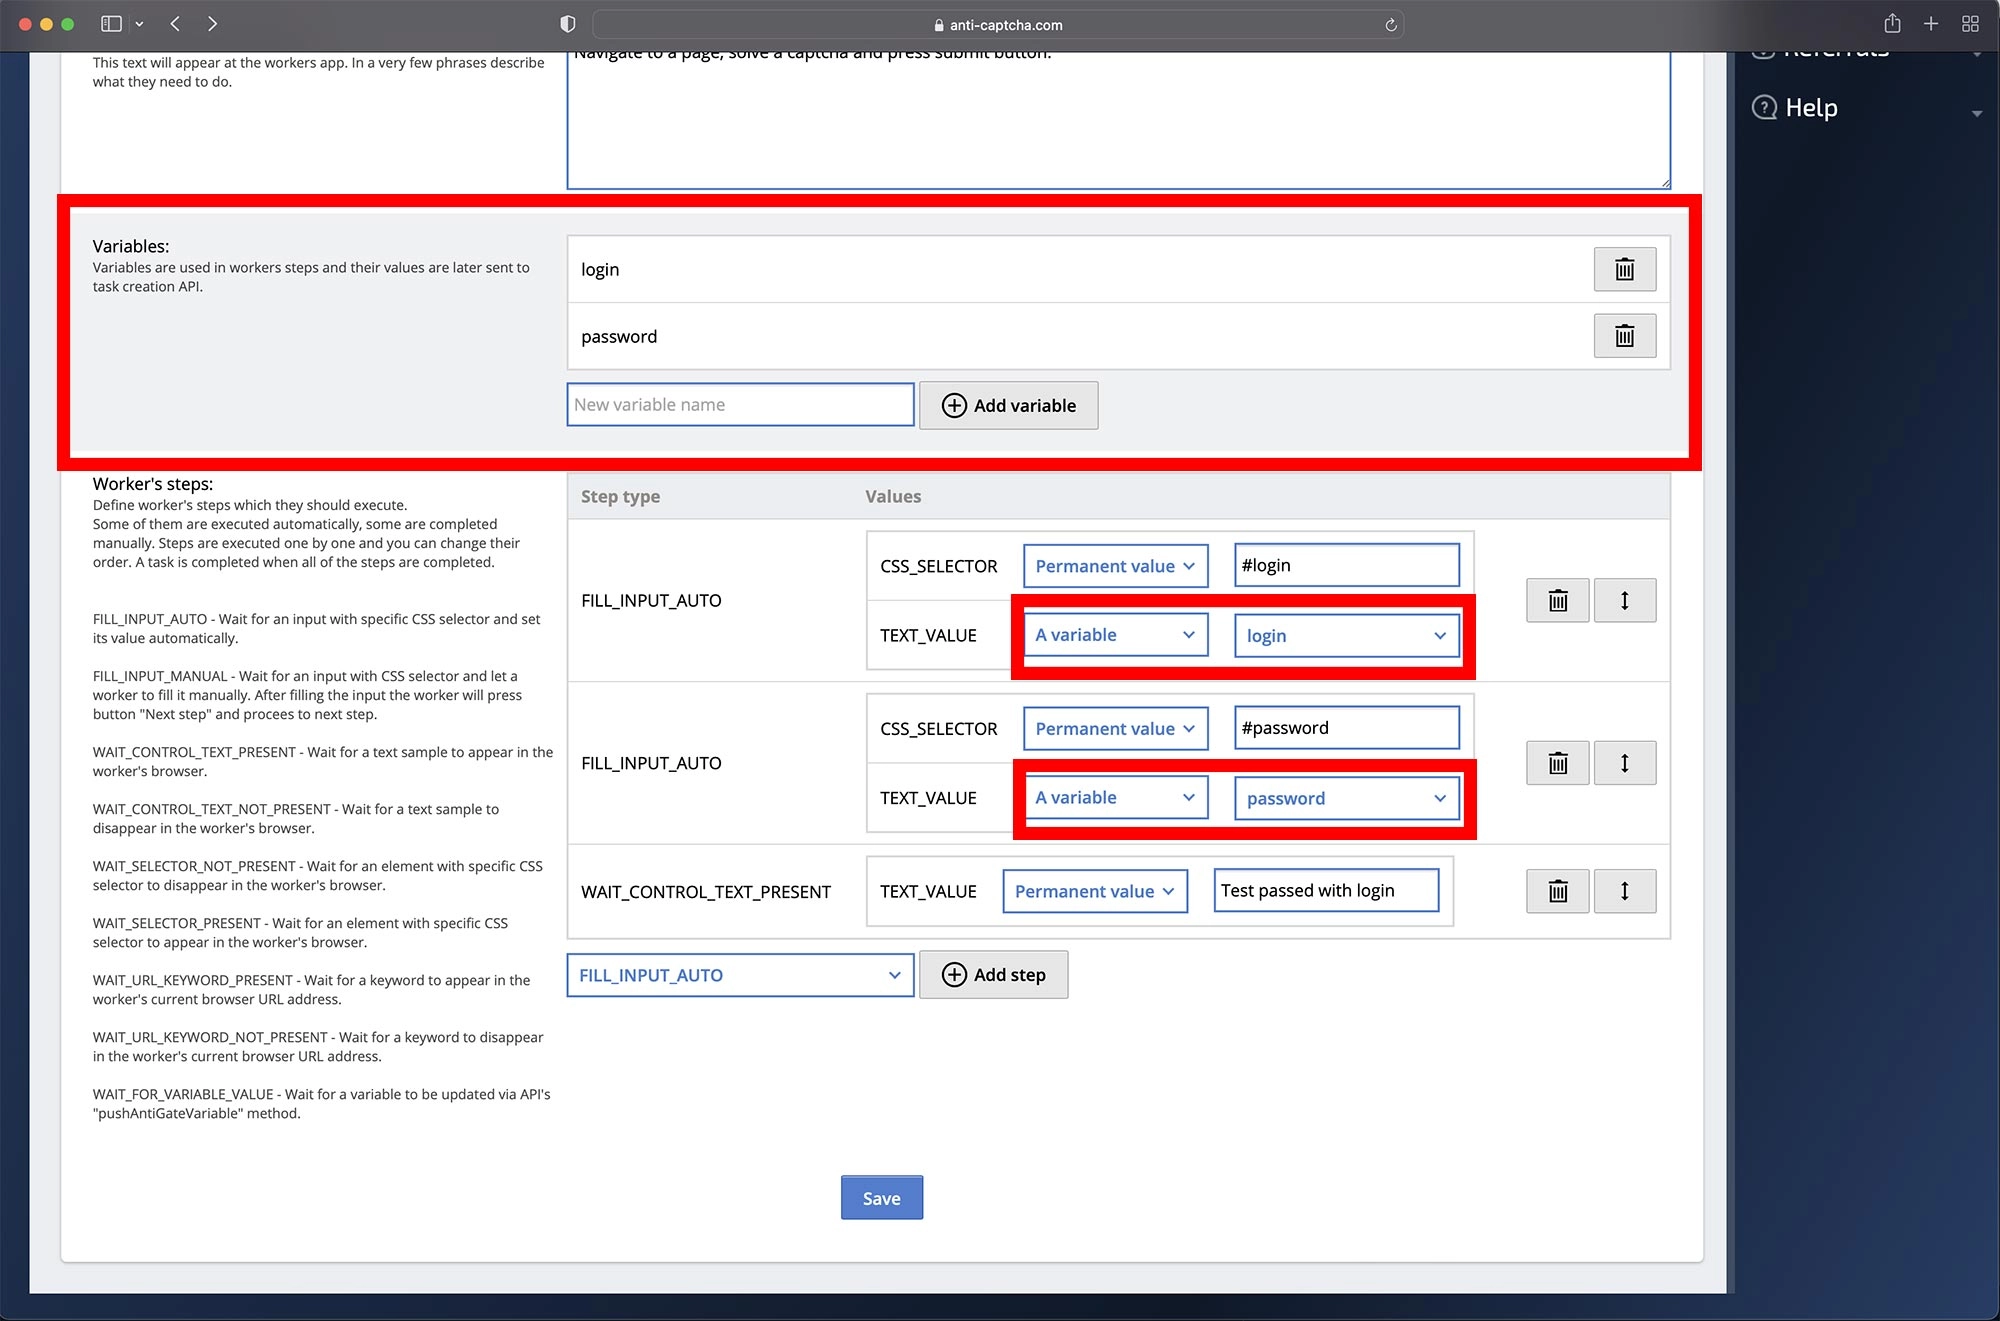 Variables used in steps 1 and 2
 - . Here you can edit and change the order of scenario steps. In our example, we do the following:
1. Automatically fill the text field with the CSS selector "#login". The value for the text field is defined by the variable "login".
2. Automatically fill the text field with the CSS selector "#password". The value for the text field is defined by the variable "password".
3. Wait for a control text to appear on the page. It is permanently set to the value "Test passed with login".
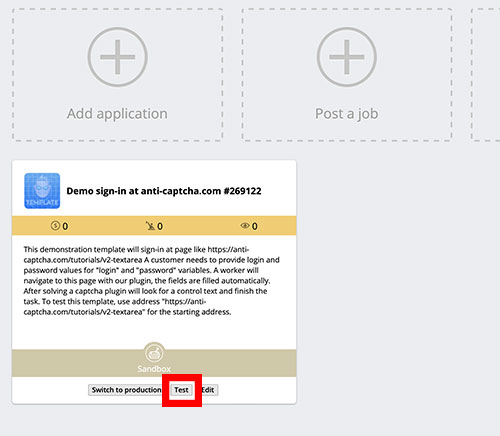
You can now save the template, and it will appear in your Developer Center. Notice that it has "Sandbox" status, meaning it's only available to you and not in the API. From here, you can try testing your newly created template as if you were your own worker.
Testing templates
Near the address bar, there's a blue bar that the plugin adds at the top of the target page. This is how workers know about their assignments and control the execution of the task.
Also, note that login and password fields are hidden when filling them with variables. This is intentional. Although workers have full access to the task data via the developer's console, 99.99% of them don't bother examining what's happening behind the scenes.
The same snapshot data can be received from the API. But to make your template available in the API, first, we need to publish it.
Publishing templates
- Private templates are available only with your API key. Other customers can't use them. Cost of reviewing and publishing: $1.
- Public templates are available to everyone. You'll earn 5% on each customer's expenses with this template. You'll need to leave some contacts for our customers to reach out for your help if something goes wrong with your template. Cost of reviewing and publishing: $1.
- No illegal activity of any kind.
- Templates should not duplicate existing ones.
- Don't submit dummy or test templates.
- Provide an example web address and variable values for review. We'll launch a test, and all the steps should complete successfully.
API requests
A task creation request to the API for the above AntiGate template would look as simple as this:
curl -i -H "Accept: application/json" \
     -H "Content-Type: application/json" \
     -X POST -d '{
    "clientKey":"YOUR_API_KEY",
    "task":
        {
            "type":"AntiGateTask",
            "websiteURL":"https://anti-captcha.com/demo/?page=recaptcha_v2_textarea",
            "templateName":"Demo sign-in at anti-captcha.com #123456",
            "variables": {
                "login":"some value",
                "password":"some value"
            }
        }
}' https://api.anti-captcha.com/createTask
That is, you pass the "templateName" and "variables" parameters to fill in the template.
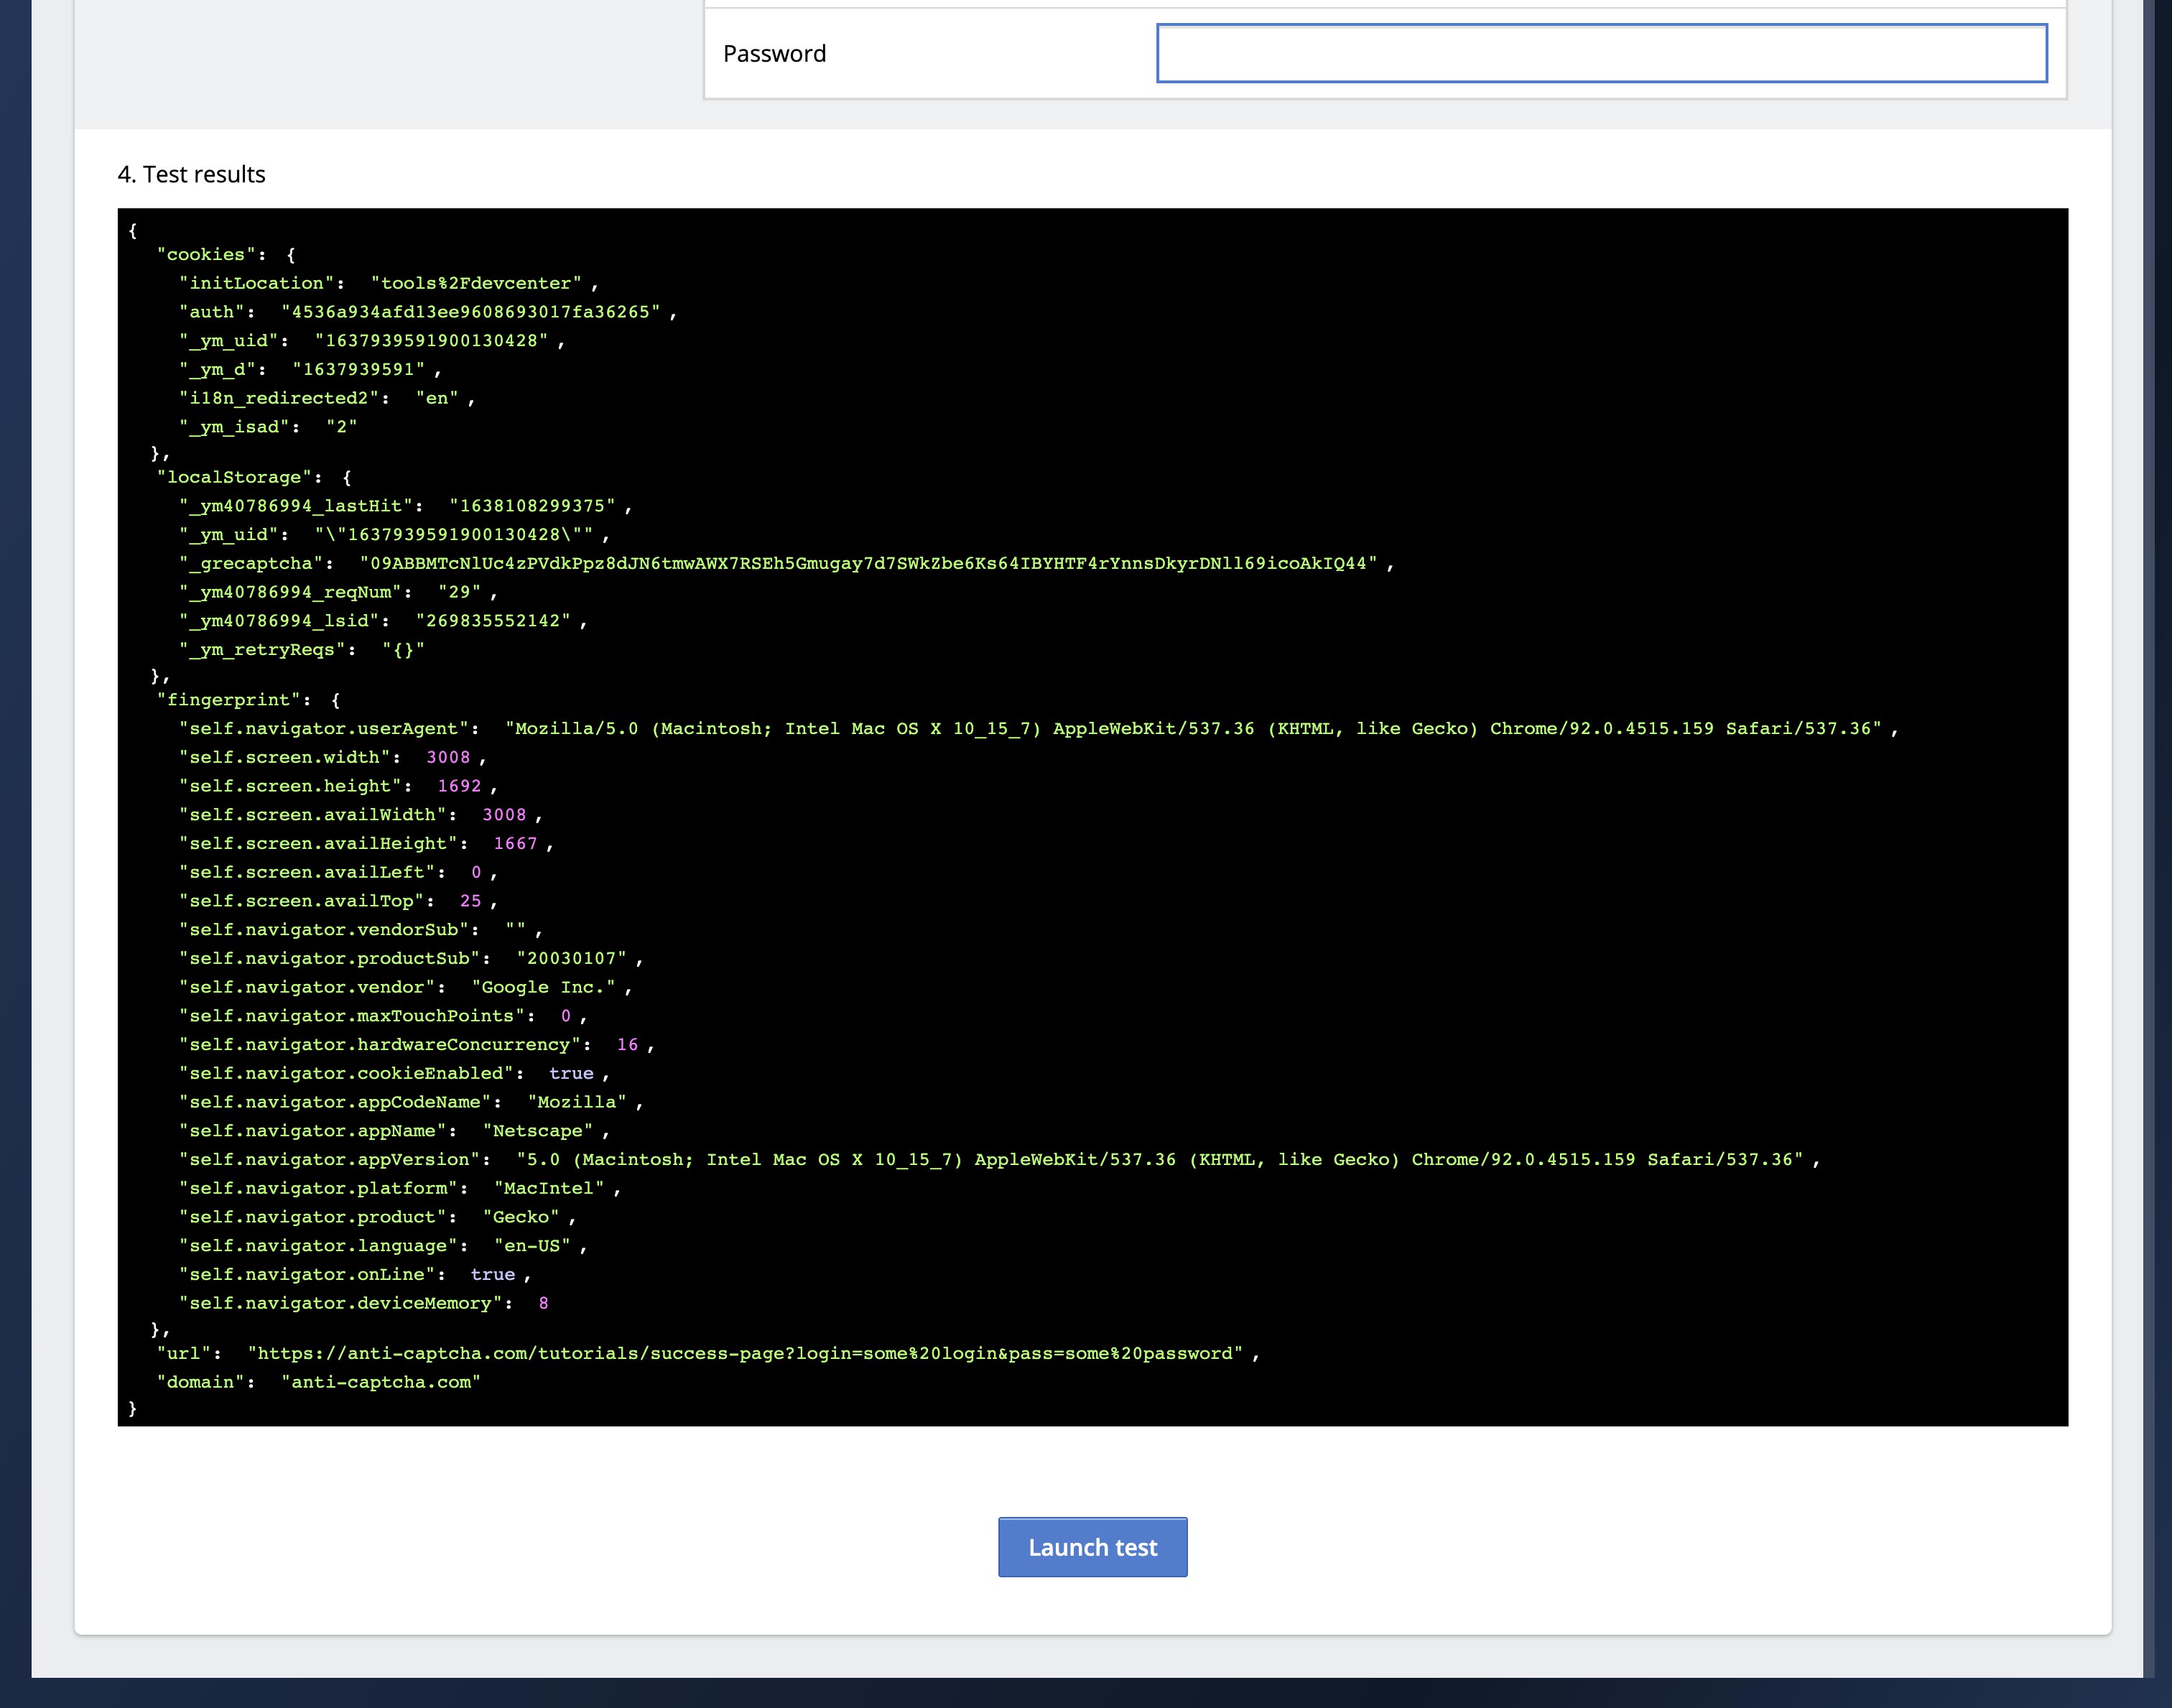
Using task results
Creating your own templates
Simply follow the steps above without loading the example template. Fill in all the details correctly, and carefully add the steps. Note that all the steps are executed sequentially. The plugin won't allow the execution of the next step until the current one is completed. At any time, you can save your template and test it with the worker's browser plugin.
Pricing
At this time, we set the price at $2 per 1000 tasks. Additionally, every second of the task execution costs 1/60 of the task price. For example, the task costs $0.002, and the worker spent 20 seconds solving it.
The final cost will be $0.00266 = 0.002 + (0.002 / 60 * 20) .